Ceramic nail drill bits have become a go-to for home nail enthusiasts precisely because they handle delicate work well — but only if you know which shape does what, and when to swap them out.
What Makes Ceramic Bits Different from Standard Metal Ones?
Affiliate disclosure: This article contains an affiliate link. If you buy via our link, we may earn a small commission at no extra cost to you.
The short answer is heat. Standard metal bits (typically high-speed steel) generate friction as they work, which can warm the nail bed and make the whole experience uncomfortable — especially for anyone with thinner or more sensitive nails. Ceramic runs noticeably cooler, which matters when you’re spending several minutes on a single nail.
Ceramic is also gentler in terms of how it removes product. It tends to shave rather than grind, which gives you more control over how much gel or acrylic you’re taking off at once. For home use, that’s genuinely useful — it’s far easier to be precise when you’re not wrestling with a bit that’s removing material faster than you intended.
That said, ceramic isn’t a one-size-fits-all fix. If you’re looking to do heavy removal of thick acrylic or hard builder gel, a carbide bit may still be the more efficient choice. Ceramic earns its place in prep work, finishing, and cuticle area tidying — not necessarily in aggressive bulk removal.
Understanding Which Shape Does What
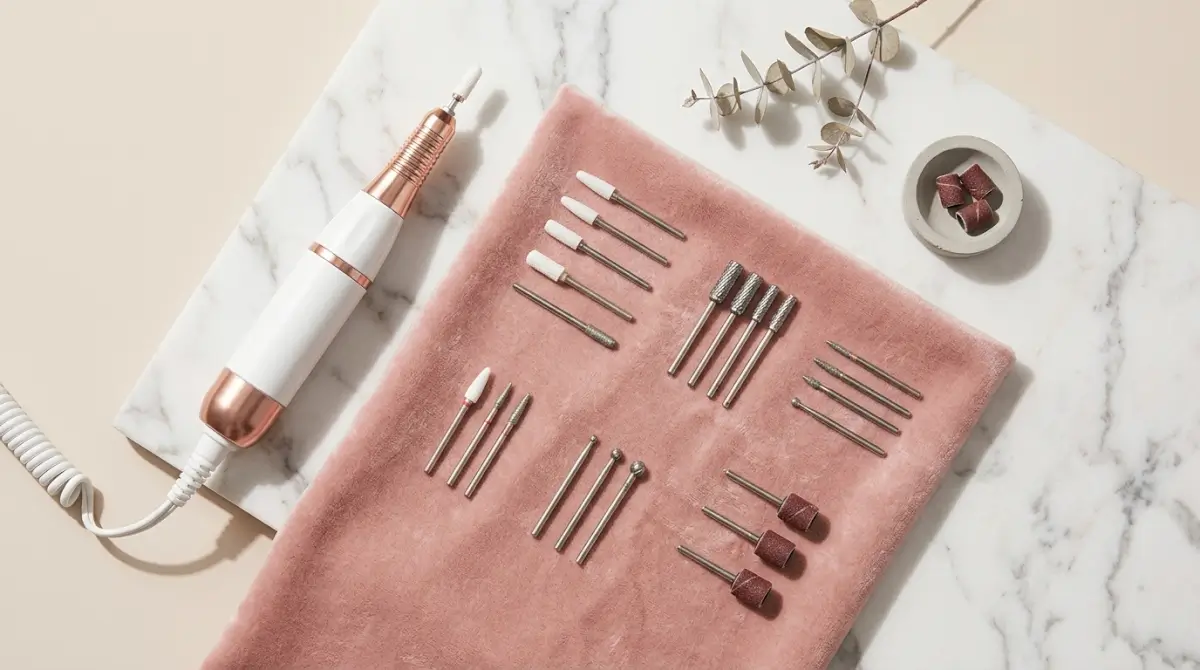
A drill bit set with multiple shapes isn’t just nice to have — each shape genuinely serves a different purpose, and using the wrong one is what leads to that over-buffed, thinned-out nail look that takes weeks to grow out.
The barrel or cylinder shape is your everyday workhorse. It’s ideal for filing the surface of gel or acrylic to remove shine before soaking, or for smoothing out the bulk of product after initial application. Use the flat end for the nail surface; the sides are what shape the sidewalls.
The cone or tapered point is designed for getting into the cuticle area and around the sidewalls — places where product tends to lift first because application wasn’t quite flush with the skin. Working slowly here makes a real difference to how long your nails stay intact between appointments.
Flame-shaped bits are for detail work around the cuticle line. They look almost too delicate to be useful, but this is the shape that lets you tidy the proximal fold (the skin just behind the nail) without nicking or irritating the surrounding skin.
A ball or round bit is typically used for removing gel or product from underneath — useful if you’re working with nail extensions that need to be cleaned up at the free edge or have product build-up on the underside.
Finally, the safety bit (sometimes called a cap) has a smooth, rounded tip and is specifically designed to push back and clean the cuticle area without cutting. It’s the one to reach for if you’re nervous about working near skin — it removes dead skin cells from the nail plate surface without the same risk as a sharper shape.
When to Replace Your Bits
One of the most common mistakes with drill bits — any type — is using them well past their useful life. A dull ceramic bit doesn’t just work less efficiently; it can drag rather than glide, which increases the chance of heat build-up and surface damage to the nail.
The practical signal is straightforward: if you’re pressing harder than you used to, or the bit is leaving a rough rather than smooth finish, it’s time to replace rather than push through. For home use, a good-quality set used regularly should last several months before the bits start to lose their edge — but that depends on how often you’re drilling and what products you’re working on.
The MelodySusie 7-piece ceramic nail drill bits set covers all the key shapes — barrel, cone, flame, ball, and safety bits — which means you’re not having to source individual pieces as your technique develops. It’s a sensible starting point for anyone moving from manual files to an electric nail drill, and the ceramic construction keeps it appropriate for home use where precision matters more than speed. It’s not a professional salon-grade setup, but it’s well-suited for regular at-home gel maintenance.
The real takeaway here is that your bit selection shapes the result just as much as your technique does. Getting the right shape for each stage of your nail routine — and replacing bits when they start to drag — is what separates a tidy home set from one that looks a little rough around the edges.
Frequently Asked Questions
Can ceramic nail drill bits be used on natural nails, or only on gel and acrylic?
Ceramic bits can be used on natural nails for light buffing and cuticle prep, but you need to work at a low speed setting and use a very light touch. The safety or ball-shaped bit is the most appropriate choice for natural nails — shaped bits designed for product removal can thin the nail plate quickly if you’re not careful.
How do you clean ceramic nail drill bits between uses?
Brush off loose product with a dedicated bit cleaning brush (a stiff-bristled toothbrush works in a pinch), then soak the bits briefly in isopropyl alcohol to disinfect. Avoid soaking for extended periods, and always allow them to dry fully before storing. Do not boil or autoclave ceramic bits — it can cause microfractures that affect performance.
Is a 7-piece set enough to start with, or do you need more bits eventually?
For most home nail routines — prep, gel removal, cuticle tidying, and finishing — a 7-piece set covers the essentials. You’d only need to expand the collection if you start working with hard gels or acrylics regularly, where you might want additional barrel sizes or a coarser grit option for faster bulk removal.
How We Research
Every recommendation on Styled & Cozy Spaces is based on ingredient analysis, retail pricing across major stockists and independent customer reviews. We do not accept payment for recommendations. When we include affiliate links, the commission does not influence which products we select.